Creating Your First Flow
Step-by-step guidance on building and customizing your first test with Donobu Studio.
This guide walks you through creating, running, and reviewing your first testing flow in Donobu Studio.
Prerequisites
- Donobu Studio installed and running (download)
- At least one LLM provider key configured in Studio settings (see Introduction)
1. Start a new flow
From the Studio home screen, you'll see the flow creation area. Enter the details for your automation:
- URL — The website where you want to perform the automation. For example:
https://en.wikipedia.org - Objective — A plain-English description of what you want to accomplish. For example: "Search for 'artificial intelligence' and navigate to the article page."
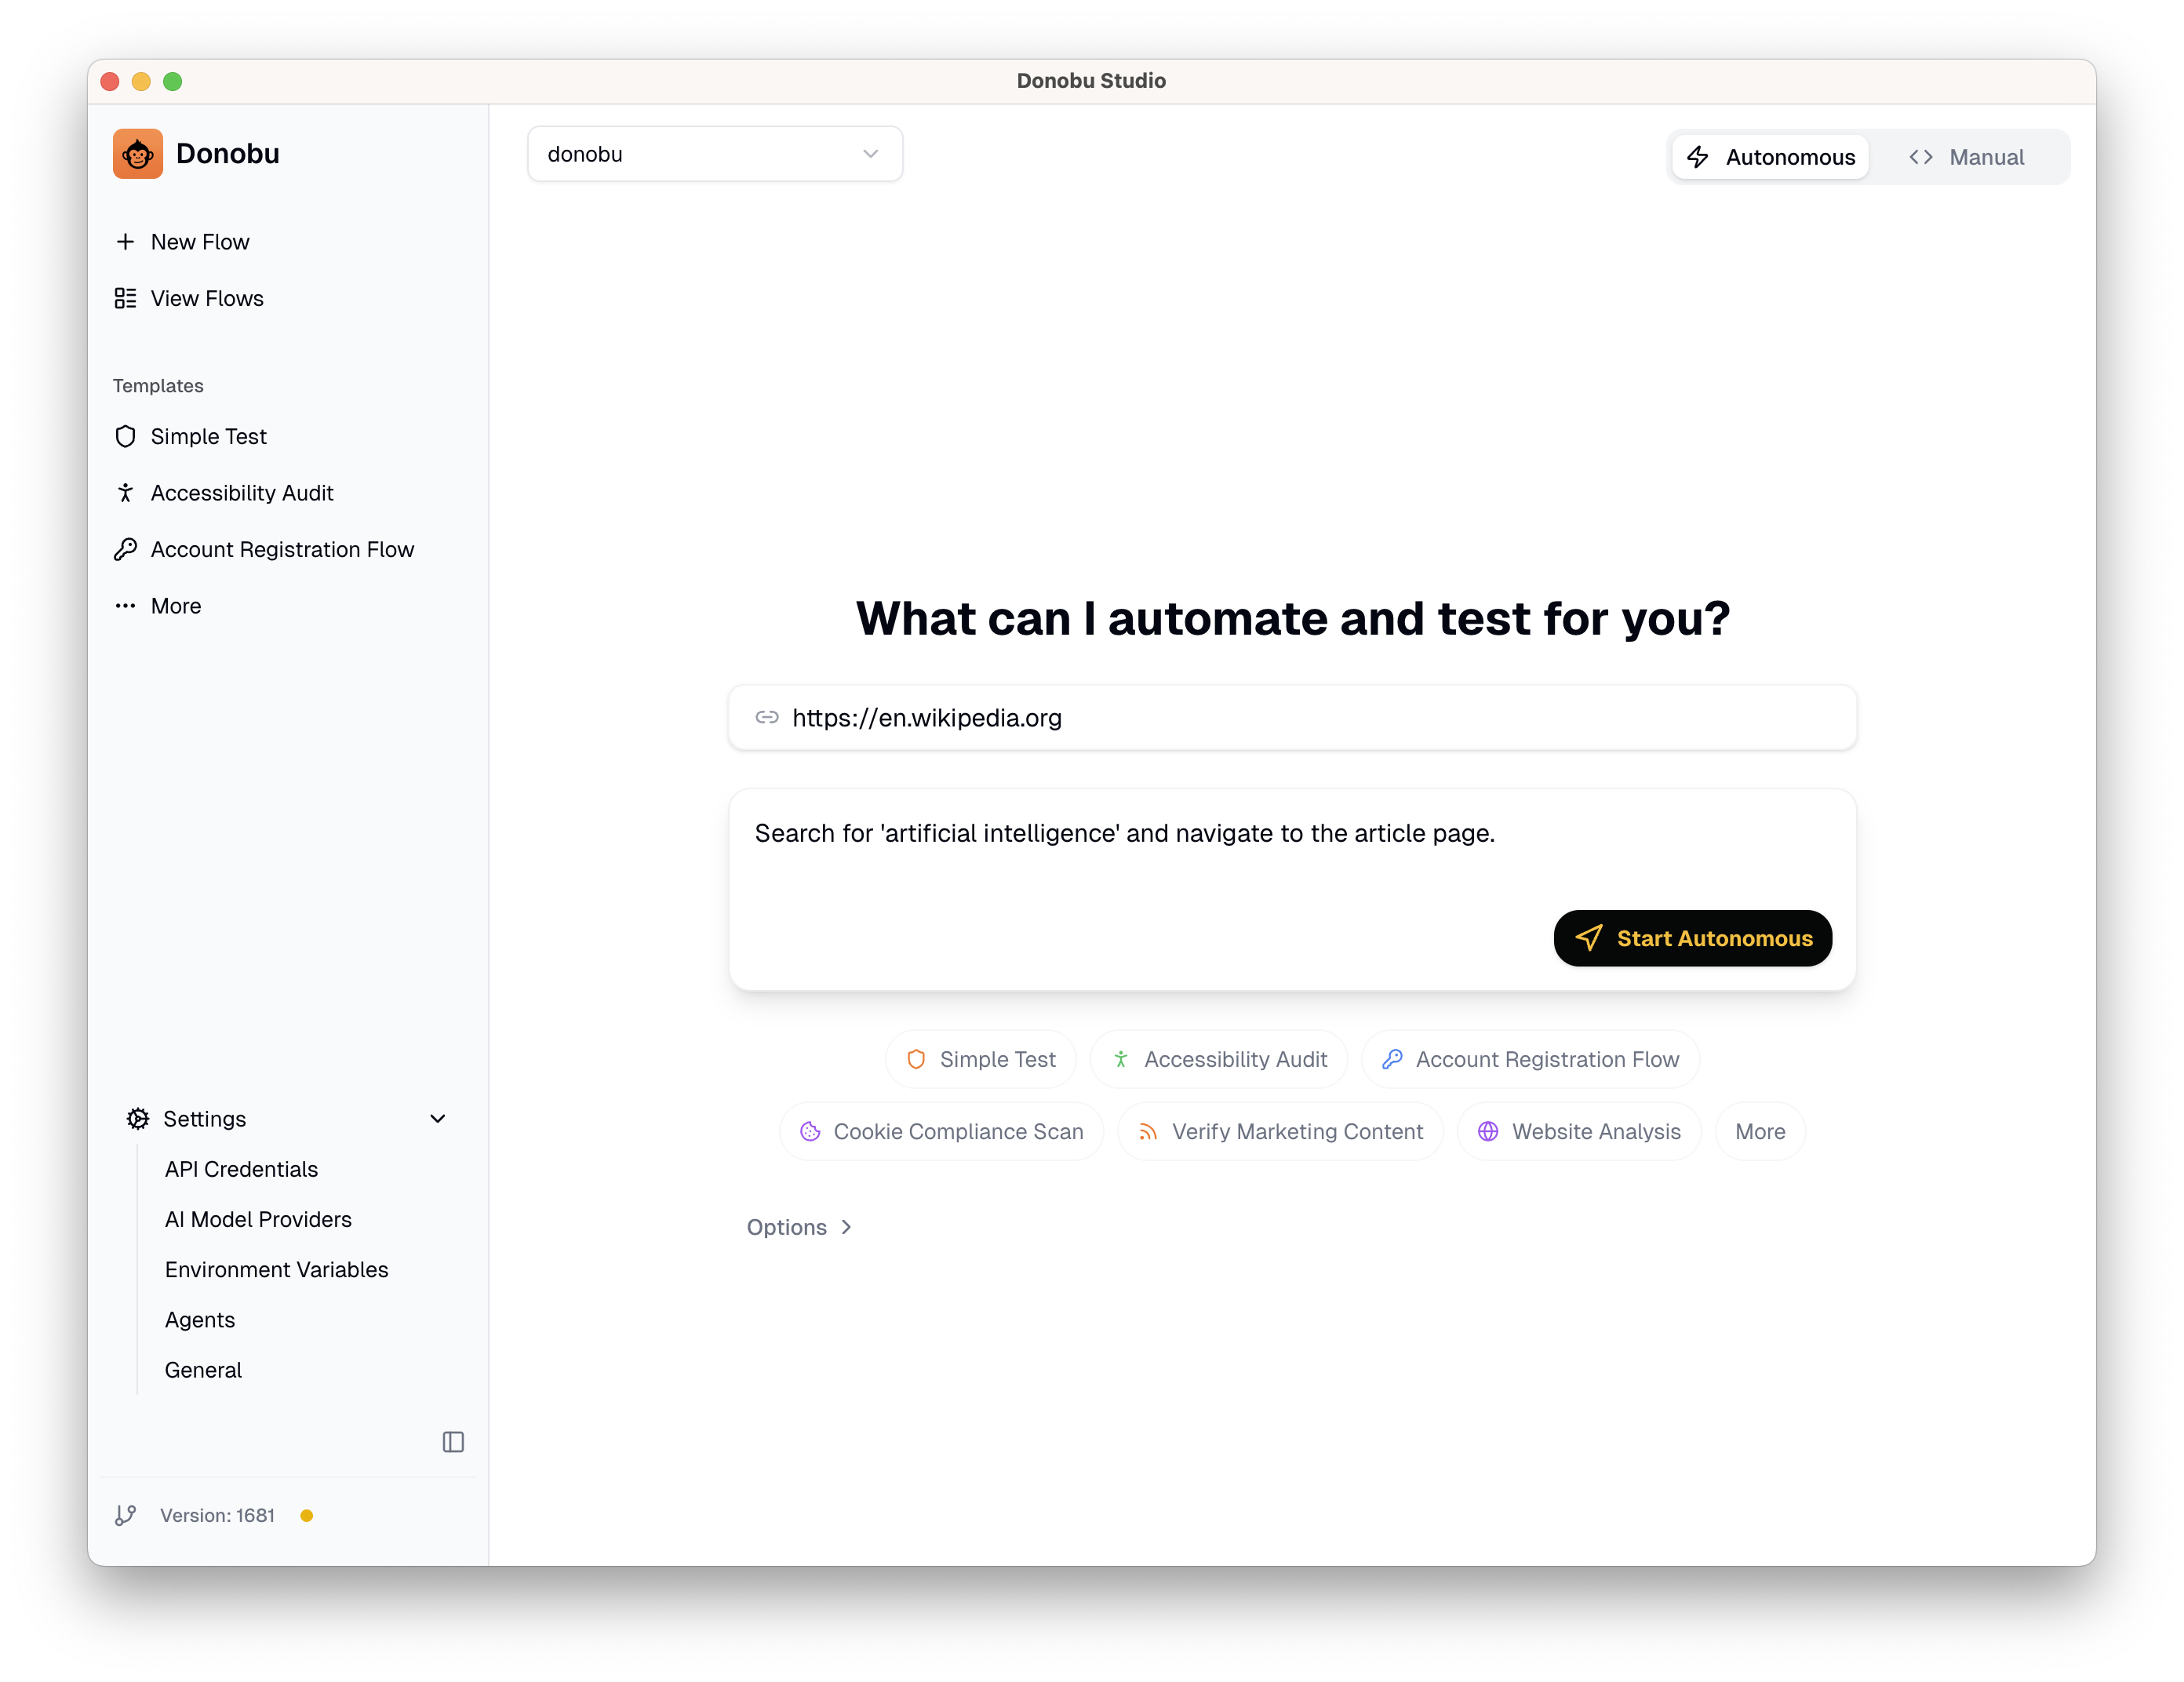
note
Keep your objective focused on a single goal. If you have a complex task, break it into multiple flows.
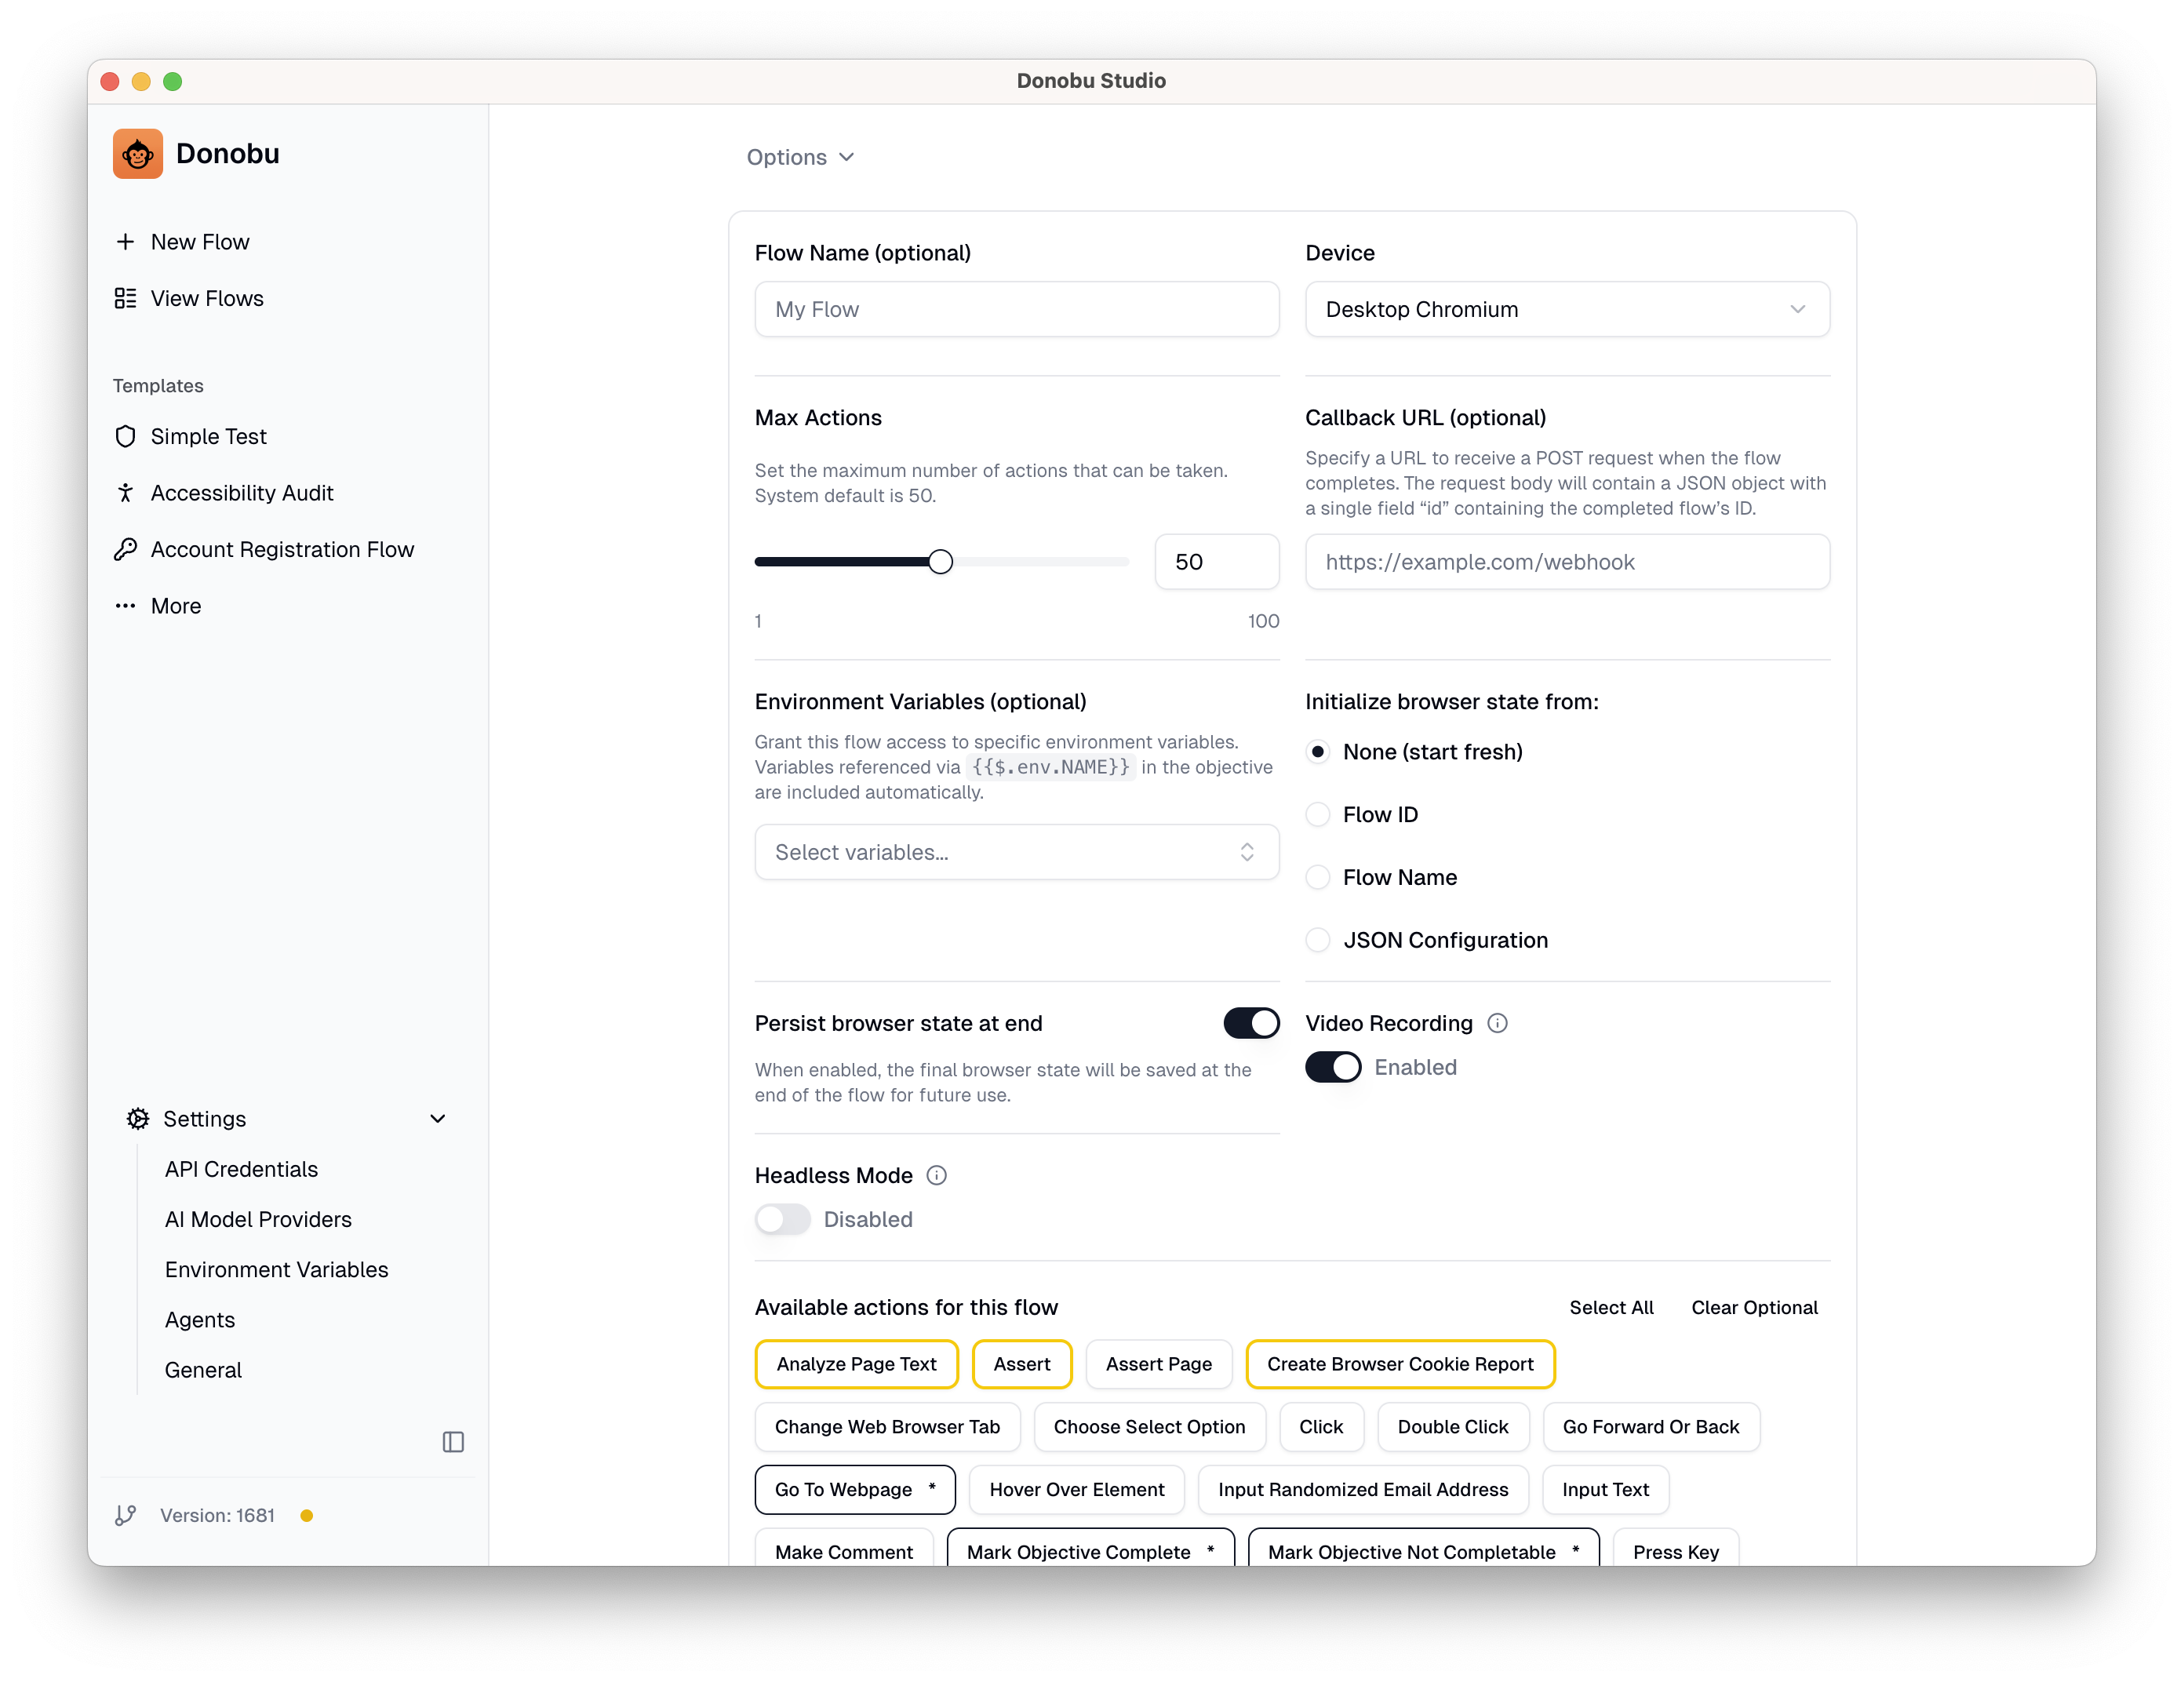
2. Configure options (optional)
Before submitting, you can adjust options for the flow:
- Device — Choose which browser and device profile to use.
- Max Actions — The maximum number of actions Flow Pilot can take. The default works well for simple tasks; increase it for more complex multi-step flows.
- Environment Variables — If your objective references sensitive data (like credentials), configure Environment Variables under Settings and select them here.
- Browser State — Restore your logged-in state created by another flow. See Using a Logged-In Browser State for authentication flows.
- Available Actions — Select which actions the AI has access to. Use this to limit the actions for simple tests, or add new capabilities for complex or test-adjacent tasks, for example running an accessibility test.
3. Submit and watch Flow Pilot work
Click Submit to start the flow. Donobu will:
- Open a browser window
- Navigate to the target URL
- Use Flow Pilot (the AI agent) to determine and execute the best sequence of actions
- Capture a screenshot after each action
You can watch the flow execute in real time. If something goes wrong or takes too long, click the Stop button to cancel.
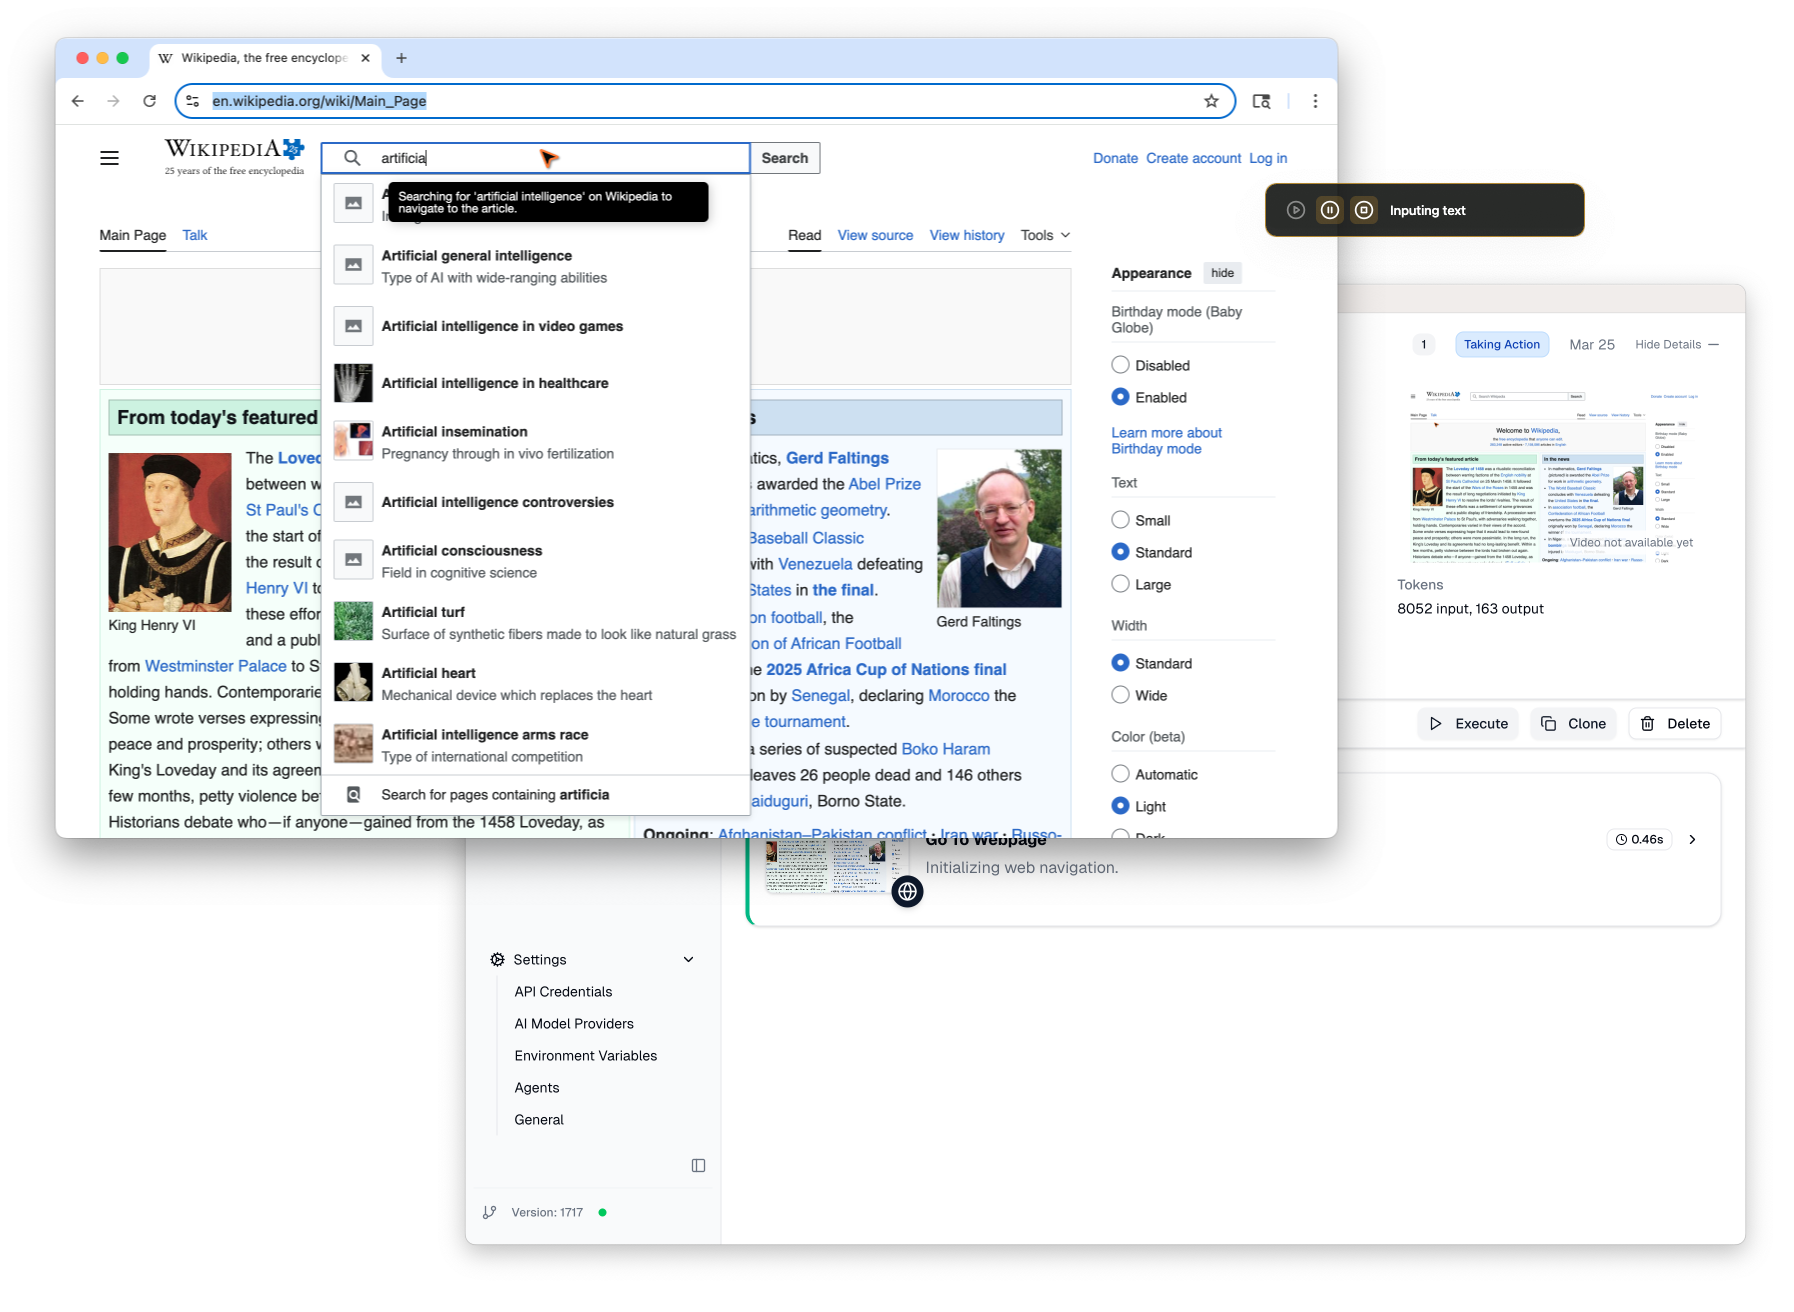
4. View Flow Actions
As the flow runs, you'll see each action appear in the timeline:
- Action Type — What Flow Pilot decided to do at this step (e.g. "Click" or "Input Text")
- Action description — Details about the action (e.g. "Searching for 'artificial intelligence' in the Wikipedia search bar to find the relevant article.")
- Status (red/green) — Whether the action succeeded or failed
- Screenshot — A visual record of the page state after the action
Expanding the action will also show you additional details, suck as the exact text string that was typed. These details vary based on the type of action.

5. View Flow Details
Once the flow completes, click on the flow to see its full detail view. The title bar shows:
- Name - The flow name, which you can edit by clicking the pencil icon
- Agent — The AI agent that Flow Pilot used to execute the flow
- Run Mode — Autonomous (AI-driven) or Deterministic (replayed from cache)
- Actions — How many actions were taken
- Status — Success or Failed
- Date — The date the test was executed
Under that are some additional details:
- Objective — The prompt for the AI for what the flow should do
- ID — The unique flow ID, which can be used to reference the flow when referencing browser state
- Runtime — The duration of the flow
- Tokens — The number of input and output tokens used by the AI during flow execution
Below the flow details, you'll find some tabs and action buttons:
- Actions - How many actions were taken
- Canvas tab — An alternative view of the actions list
- List tab — The default actions view
- Code tab — Generate a draft Playwright test script from the flow. You can use this to add the test to your CI/CD pipeline.
- Logs tab — Some additional details useful for debugging issues with your flow
- Execute — Rerun the flow without using AI. This replays the exact same actions for faster, low-cost regression testing.
- Clone — Open the flow creation screen pre-filled with the same settings, so you can create a new version with tweaks.
- Delete — Remove the flow and all its associated data.

6. Try a rerun
Now that you have a successful flow, try rerunning it:
- Open the flow's detail view
- Click Execute
The rerun executes in Deterministic mode — it replays the exact same action sequence without AI calls, making it fast and free (notice the token count is zero). This is the basis of regression testing in Studio: run a flow once with AI, then rerun it whenever you want to verify the same workflow still works.
If a rerun fails (because the target website has changed), you can create a new flow with the same objective to let Flow Pilot adapt.
What to try next
- Change the objective to something more complex, like navigating to a specific section of a page
- Try a different website — any public site will work
- Export the flow as code to see the generated Playwright script
- Learn about Using a Logged-In Browser State for flows that require authentication
- Follow the tutorials for more in-depth walkthroughs for both Studio and the Playwright Extension