Multi-Page User Journey (Tutorial)
Build a multi-step browser automation in Donobu Studio that navigates across multiple pages, with step-by-step progress monitoring.
In this tutorial, you'll create a multi-step automation that navigates across several pages — simulating a real user journey like browsing a store, adding items to a cart, and proceeding to checkout. You'll learn how to monitor progress and review results for complex flows.
Prerequisites
- Donobu Studio installed and running (download)
- At least one LLM provider key configured in Studio settings
- Completed the Your First Automation tutorial (recommended)
Step 1: Plan the user journey
For this tutorial, we'll automate an e-commerce browsing flow. The AI will:
- Navigate to an online store
- Search for a product
- Select a product from the results
- Add it to the cart
- Proceed to the checkout page
This involves multiple page navigations and interactions across different parts of the site.
Step 2: Create the flow
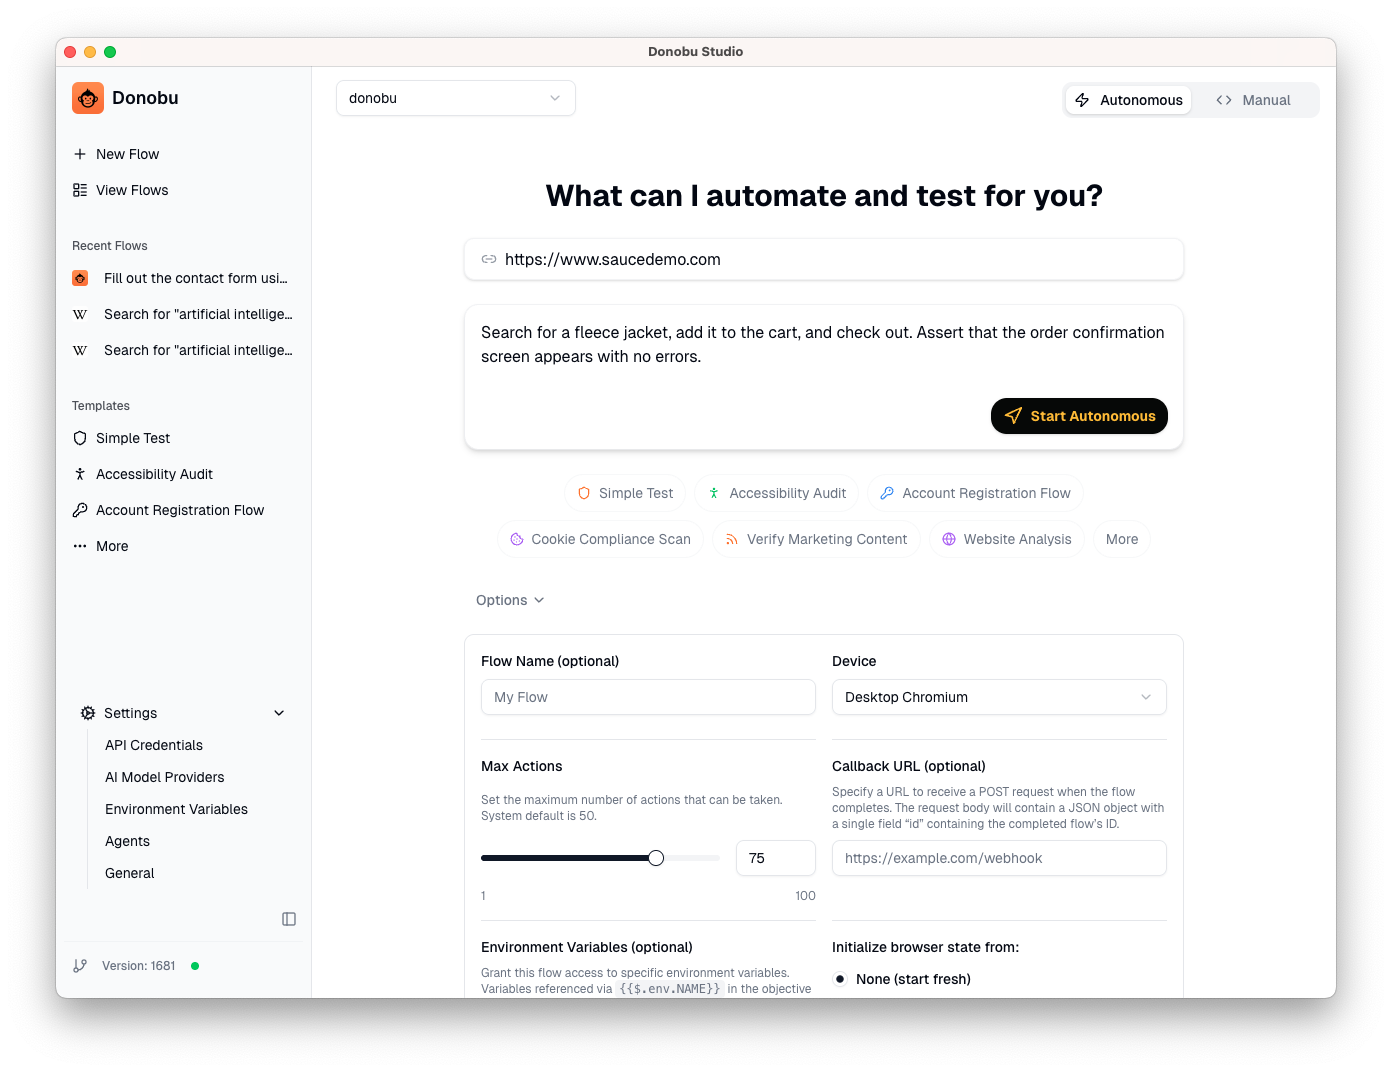
- Open the New Flow screen in Studio.
- Enter the URL of an e-commerce site (use a demo store, such as
https://www.saucedemo.com/, or a site you have permission to test). - Write a detailed objective that describes the full journey:
Search for a fleece jacket, add it to the cart, and check out. Assert that the order confirmation screen appears with no errors.
- Under Options, increase the Max Actions to 75 (the default may be too low for a multi-step journey).
note
For longer user journeys, increasing the max tool calls gives the AI more room to navigate. If the flow runs out of steps, it will stop with a partial result.
Step 3: Monitor the flow in progress
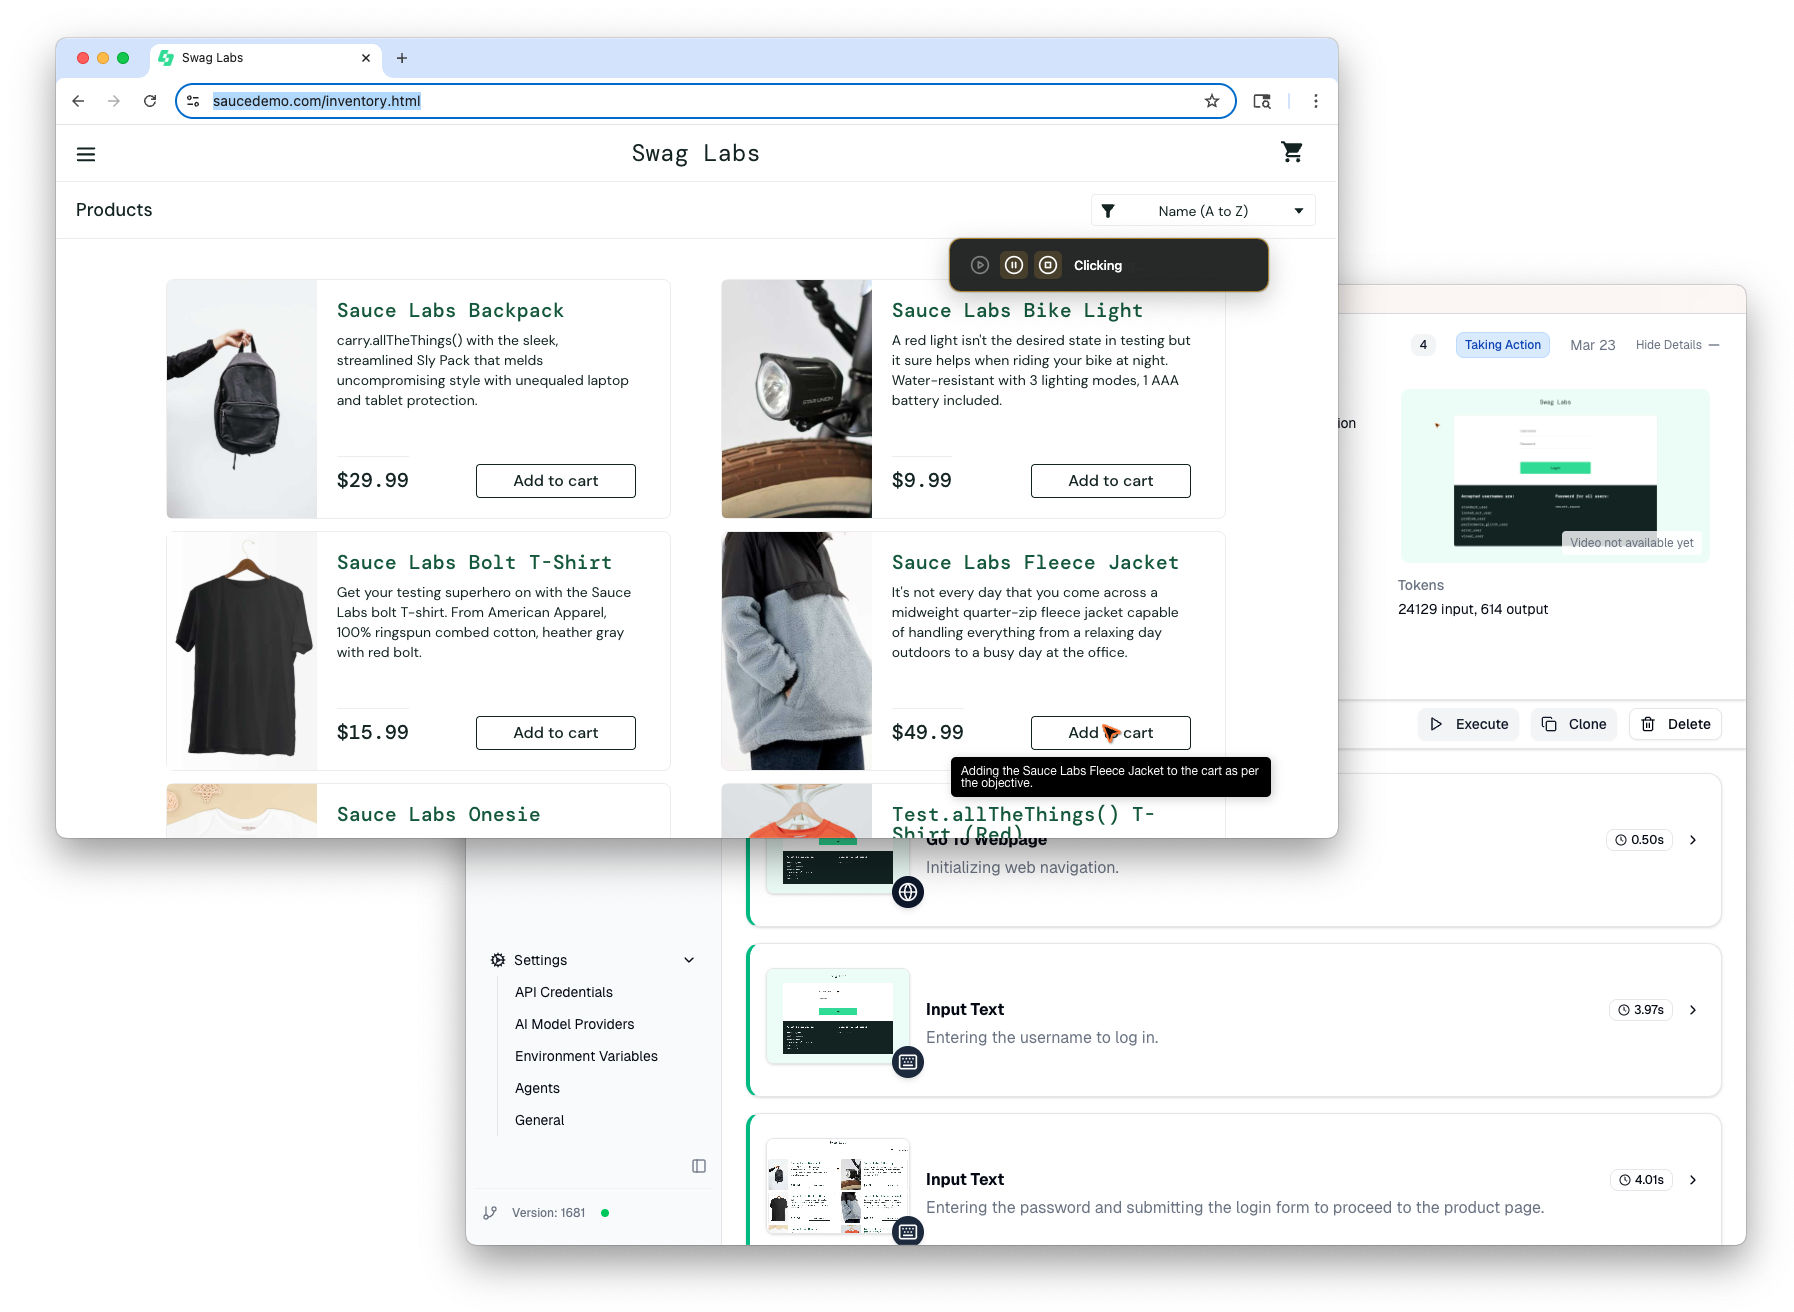
Click Start Automation and watch the flow execute:
- The Timeline updates in real time as each action is completed.
- You can see the browser navigating between pages.
- Each step shows what the AI decided to do and why.
For multi-page journeys, the AI may take exploratory steps — trying different approaches to find the right button or link. This is normal, especially on the first run.
Step 4: Review the step-by-step results
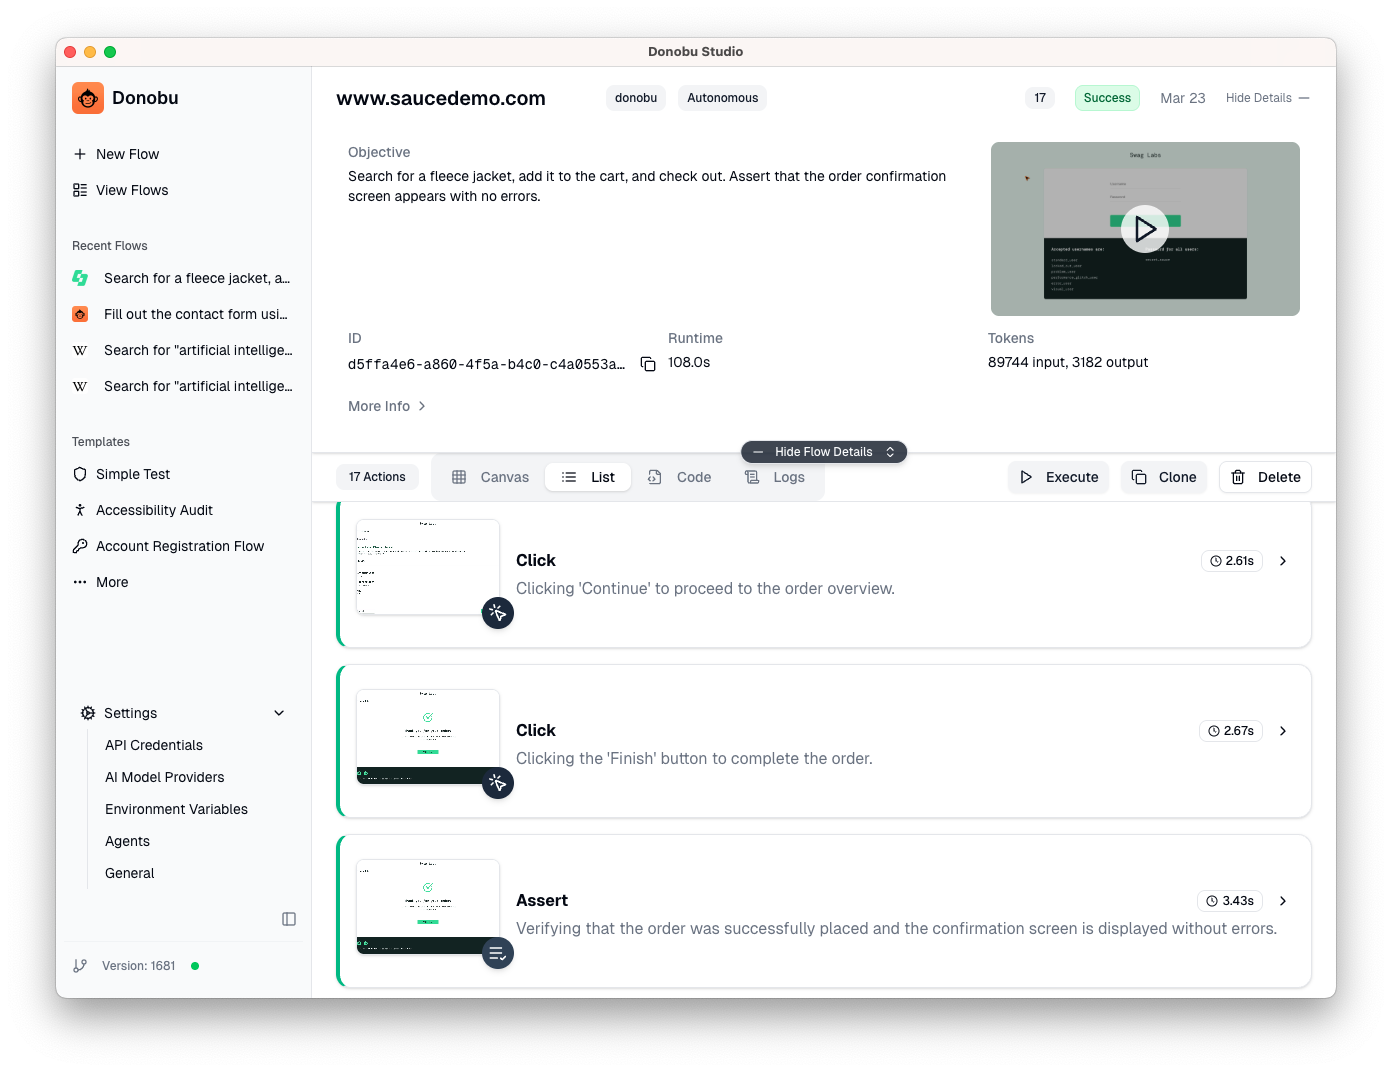
Once the flow completes, open the detail view:
- Scroll through the timeline — each action is a separate step, with a description like "Adding the Sauce Labs Fleece Jacket to the cart as per the objective." or "Clicking 'Continue' to proceed to the order overview."
- Compare screenshots — click through the screenshots to see the visual state at each step. This is especially useful for verifying that the AI navigated to the correct pages.
- Check for unexpected steps — if the AI took a wrong turn (e.g. clicked the wrong product), you'll see it in the timeline. This helps you refine the objective for future runs.
Step 5: Rerun for regression testing
Once you have a successful multi-page flow:
- Click Execute to replay the exact same action sequence.
- The rerun executes in Deterministic mode — no AI calls, just replaying the recorded steps.
- If the site has changed (e.g. the product was removed or a button was renamed), the deterministic rerun will fail at the point where the page no longer matches.
When a rerun fails, you can create a new flow with the same objective to let the AI adapt to the changes.
Tips for multi-page flows
- Be specific in the objective — "Select the first product" is better than "select a product" because it gives the AI a clear target.
- But don't be too prescriptive - A specific, step-by-step objective might be more predictable, but might be more difficult to self-heal if the website changes. For example, "Add the first product to the cart and check out" is better than "1. Click the cart button in the top-right of the screen ..." since the locations and names of buttons may change overe time, or there may be intermediate steps that need to be navigated.
- Set a reasonable max tool calls — Multi-page journeys typically need 15-30 actions, though some long and complex ones can take more than 50. Start with the default (50) and adjust based on results.
- Break very long journeys into parts — If a journey has 10+ distinct steps, consider splitting it into 2-3 shorter flows (e.g. one for browsing, one for checkout). This makes debugging easier.
- Use the video — For complex flows, the video recording gives the best end-to-end view of what happened.
What you learned
- Multi-page flows can navigate across different parts of a website by describing the full journey in the objective.
- Max tool calls controls how many actions the AI can take — increase it for longer journeys.
- Deterministic reruns replay the exact steps from a successful flow for fast regression testing.
- Screenshots and video provide visual verification of the entire journey.
What to try next
- Try the Donobu Playwright Extension tutorials to write the same kind of journey as a Donobu-enhanced Playwright test.
- Learn about Logged-In Browser State to automate flows that require authentication.