Form Automation (Tutorial)
Automate filling out a web form using Donobu Studio, with environment variables for test data and validation of the submission.
In this tutorial, you'll use Donobu Studio to automate filling out a web form. You'll learn how to use environment variables to keep test data separate from your flow objectives, and how to validate that the form submission succeeded.
Prerequisites
- Donobu Studio installed and running (download)
- At least one LLM provider key configured in Studio settings
- Completed the Your First Automation tutorial (recommended)
Step 1: Set up environment variables
Environment variables let you store test data (names, emails, passwords) separately from your flow objectives. This keeps sensitive data out of your prompts and makes flows reusable across different environments.
- Expand the Settings navigation item in Studio.
- Navigate to Environment Variables.
- Add the following variables:
Variable Value TEST_NAMEJane SmithTEST_EMAILjane.smith@example.comTEST_MESSAGEThis is a test submission from Donobu.

Step 2: Create the form automation flow
- Go to the New Flow screen.
- Enter the URL of a website with a contact form. For example:
https://www.donobu.com/contact(replace with another site if you like). - Write an objective that references the environment variables:
Fill out the contact form using the name, email, and message from the environment variables. Submit the form and verify a success confirmation appears.
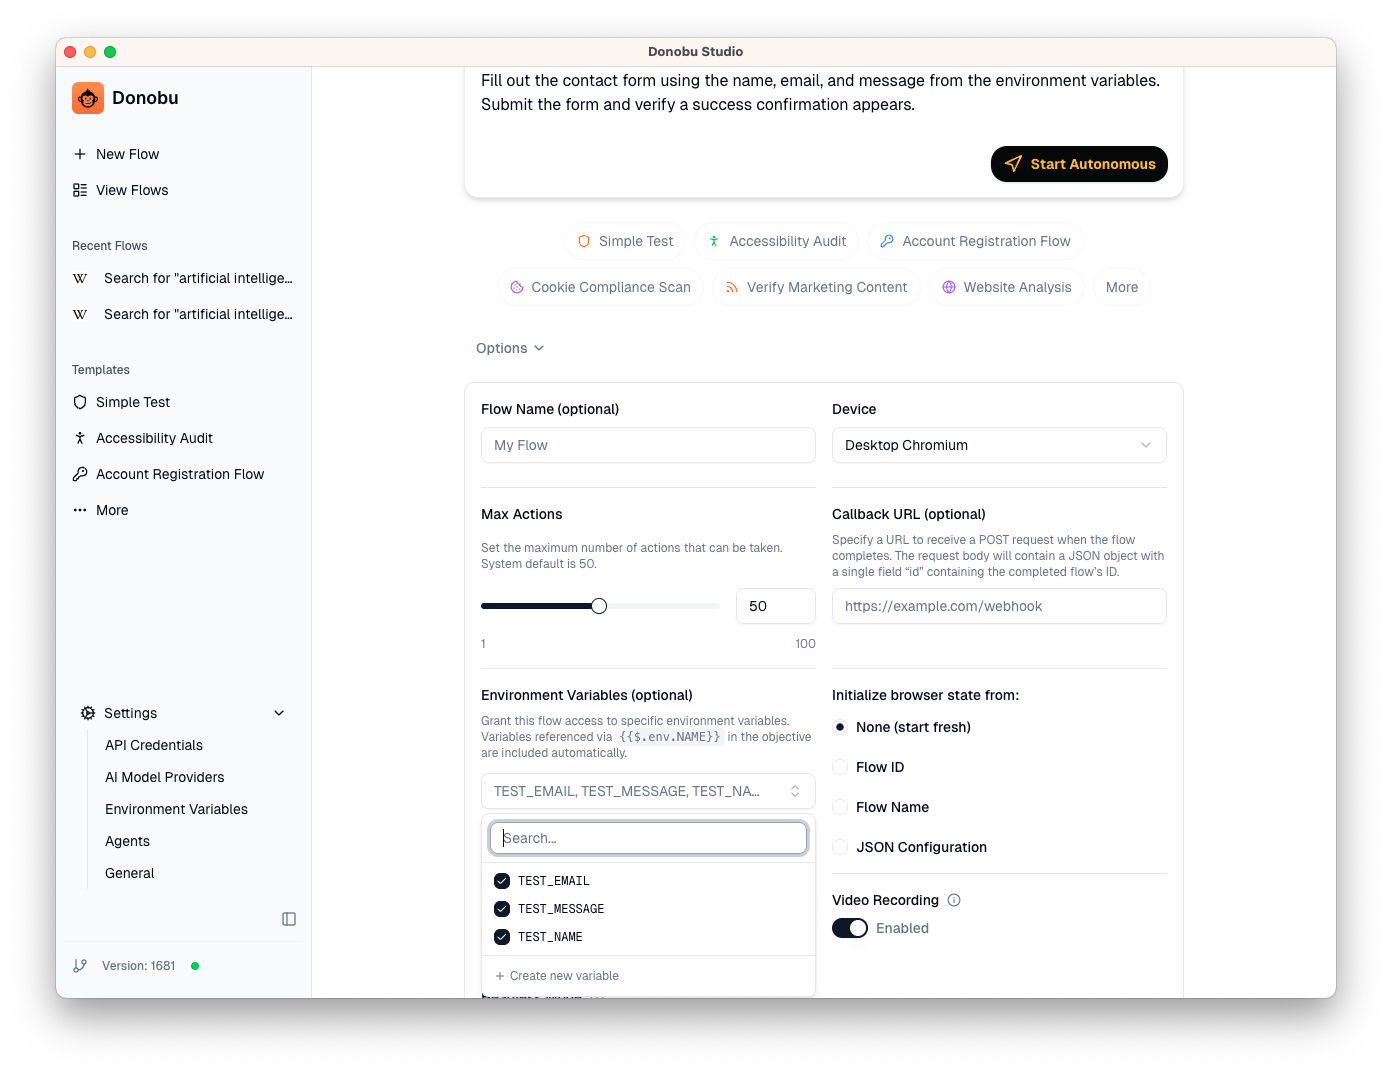
- Under Options, select the environment variables you created (
TEST_NAME,TEST_EMAIL,TEST_MESSAGE) so the AI can access them.
Step 3: Run the flow and observe
Click Submit. Flow Pilot will:
- Identify the form fields (name, email, message)
- Fill in each field using the values from your environment variables
- Submit the form
- Check for a success confirmation
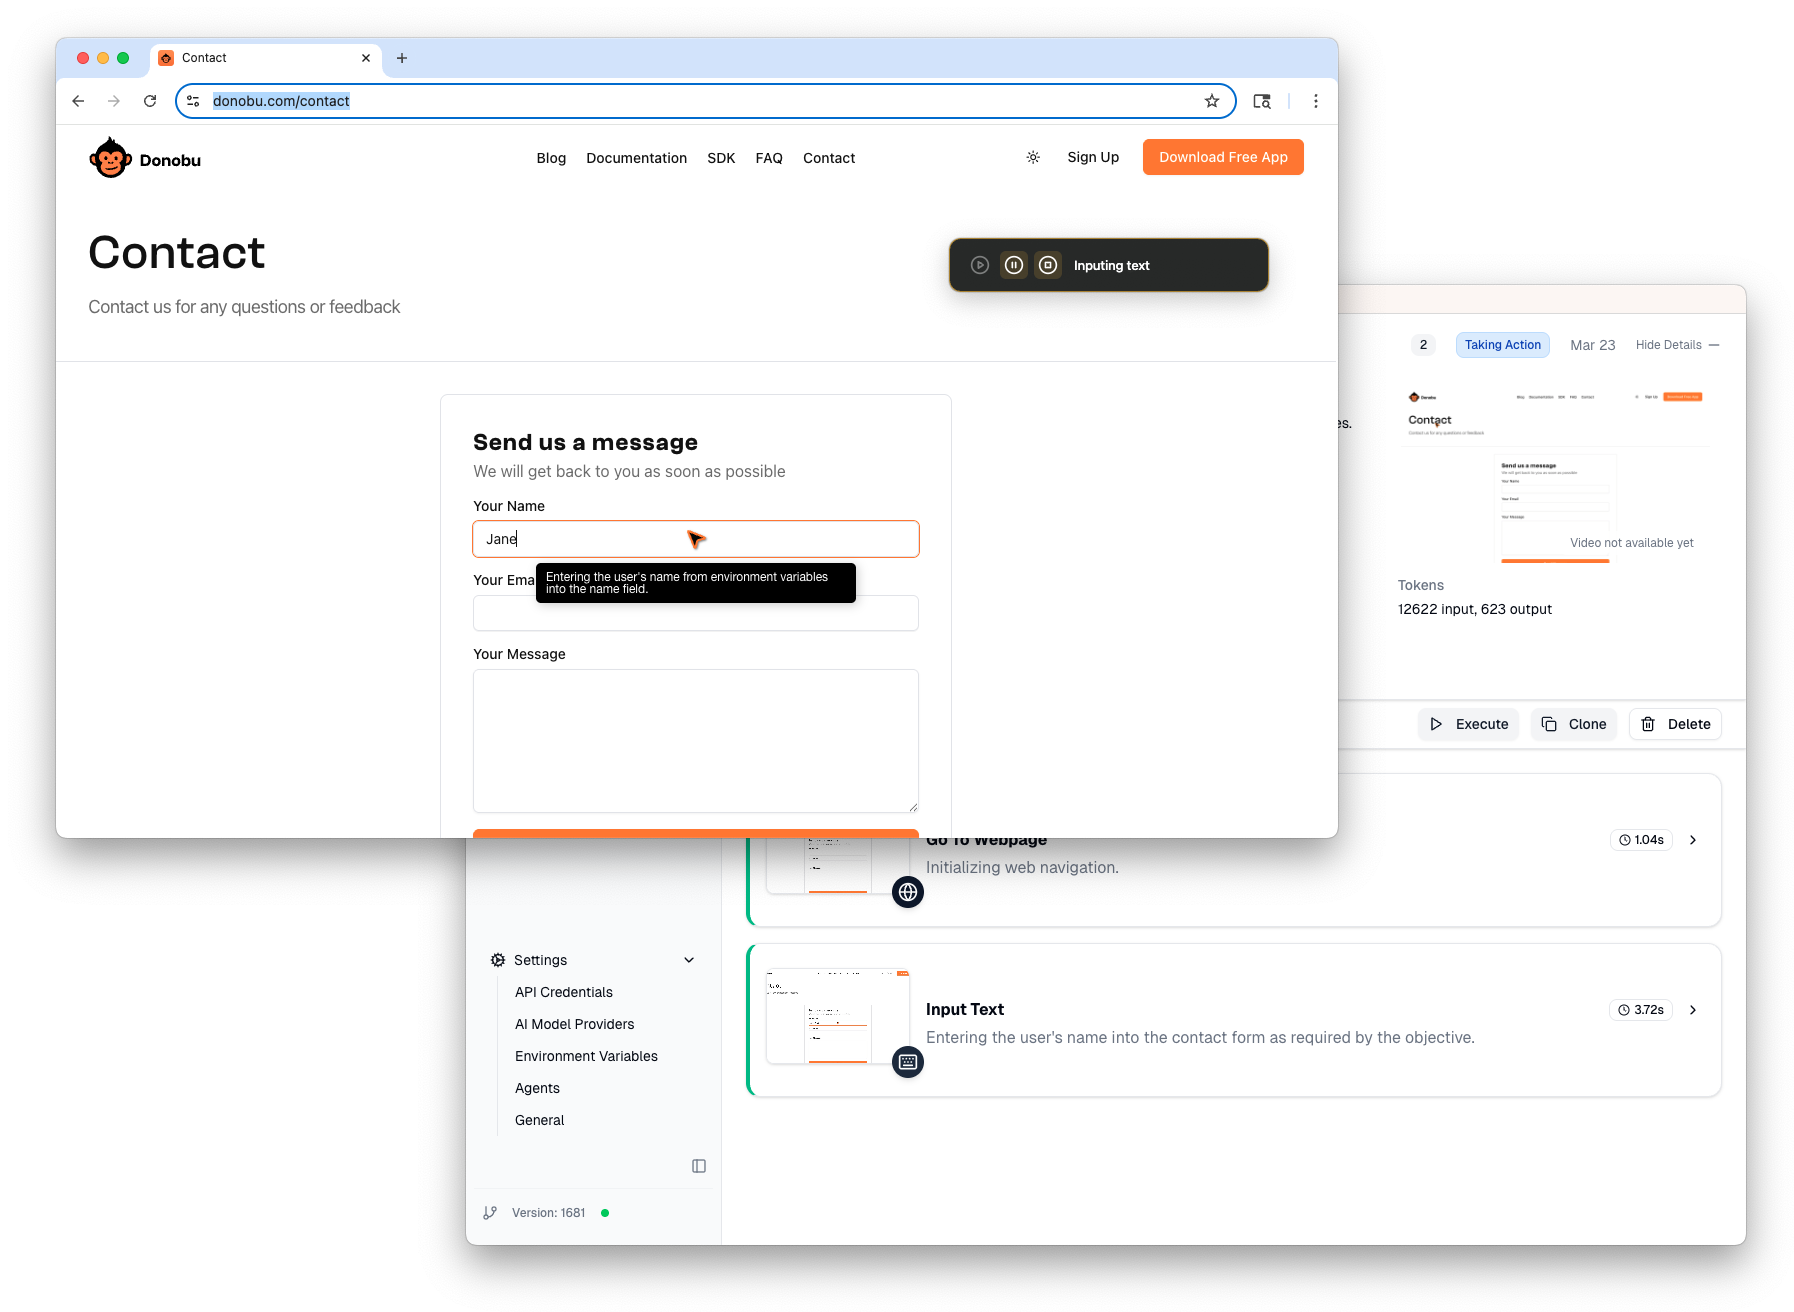
Watch the browser as the AI works. Each action appears in the timeline with a screenshot. You can also see details of what the AI is doing in the floating Control Panel.
Step 4: Review the results
Open the flow's detail view to see what happened:
- Check the Timeline — you should see actions for navigating, typing in each field, clicking submit, and validating the result.
- Review the screenshots at each step to verify the correct data was entered.
- Check the run state — it should show Success if the submission was confirmed.
<!-- [SCREENSHOT: Completed flow timeline showing form fill actions and successful submission] -->
Step 5: Rerun with different data
One of the benefits of environment variables is that you can change the test data without modifying the flow:
- Go to Settings > Environment Variables and update the environment variable values (e.g. change the name and email).
- Open the flow's detail view and click Clone — this opens the flow creation screen with the same objective and settings.
- Start the new flow. It will use the updated environment variable values.
What you learned
- Environment variables keep test data separate from flow objectives, making flows reusable and keeping sensitive data out of prompts.
- Validation can be built into the objective — ask the AI to verify expected outcomes as part of the flow.
- Clone lets you quickly create a new version of an existing flow with updated settings.
What to try next
- Try a more complex form with dropdowns, checkboxes, or multi-step wizards.
- Follow the Multi-Page User Journey tutorial to learn about multi-step flows.